Eyelash extensions are becoming increasingly popular, as more and more people look for ways to enhance their natural beauty. Eyelash extensions can add length, volume and curl to your lashes without the need for mascara or other makeup products. But it is important to know how to apply them properly in order to ensure that they last as long as possible and don’t cause any damage to your natural lashes. This article will provide a step-by-step guide on how to apply eyelash extensions, from prepping the eye area through to drying time.
What are eyelash extensions
Eyelash extensions are synthetic strands of hair attached one by one onto individual natural eyelashes with adhesive glue, in order to give the appearance of longer, thicker and darker lashes. They come in various lengths, thicknesses and colors so you can customize them according to your desired look. Lash artists must be trained in lash application techniques before they can offer this service professionally. The process usually takes between 1-2 hours depending on the desired look and amount of work needed per eye.
What are the types of eyelash extensions
There are three main types of eyelash extension: classic (or single), hybrid (mixture of classic & volume) and Russian volume (multiple strands). Classic lashes involve applying a single synthetic lash strand onto each individual natural lash using an adhesive glue. Hybrid is a combination of classic & volume which gives more definition & texture than classic alone does but less than Russian Volume does; it also uses an adhesive glue for application but has slightly different techniques compared with classic lash application methods due to its mixed characteristics between two different styles – “Classic” & “Volume”. Lastly, Russian Volume is a technique that involves applying multiple ultra-fine synthetic strands onto each individual natural lash. It requires advanced skills because precise placement control is necessary to maintain an even weight balance across all applied lashes. This type of service usually takes longer than both Classic and Hybrid applications due to its complexity in technique. Attaching multiple fine strands at once requires more precision compared to the one thick strand used in Classic lashing services.

What is the application process
- The first step before beginning any application process is to ask the client if they would like you to sign a waiver form acknowledging that they understand the potential risks involved with having this procedure done, such as irritation or damage caused by improper technique or product use. Signing this form also serves as legal protection should anything go wrong during or after their appointment.
- After the signing of the forms has been completed, the next step involves determining what kind of look your client wants, which includes figuring out what kind of length, thickness, color, and curls best suit their face shape and features. All of these factors will help you decide which type(s) and style(s) of lashes should be used during their appointment. For example, if someone has round eyes, then something like a C Curl may be better suited compared to someone who has almond-shaped eyes where a J Curl could be more suitable based on overall facial structure characteristics. You’ll normally have learned about this in the lash extensions training you’ve taken.
- Once all details have been discussed, sanitizing hands becomes necessary prior to beginning the actual service. Here, oil residue from the skin needs to be removed completely; otherwise, it could result in adhesion failure once the product comes into contact with oils present on the hands.
- Next up would be preparing the eye area, which includes removing existing makeup if present along with cleaning around the eye areas too. Both steps are necessary to ensure proper bonding occurs between real/natural lashes and false ones being applied. Following that, it would require placing either gel pads or under-eye patches underneath the eyes, so extra padding is provided to prevent any direct contact made between the skin and adhesive glue when applying false eyelashes later down the line. Additionally, it helps hold down the lower lid securely while still allowing the artist access to the top section when working on the upper portion too during the service being rendered.
- After the patches have been placed, the next part involves taping down the lower lid again, ensuring security since the tape prevents the lid from opening wider unexpectedly while the artist works on the top half. And now the actual application of eyelash extensions begins, which may take some time.
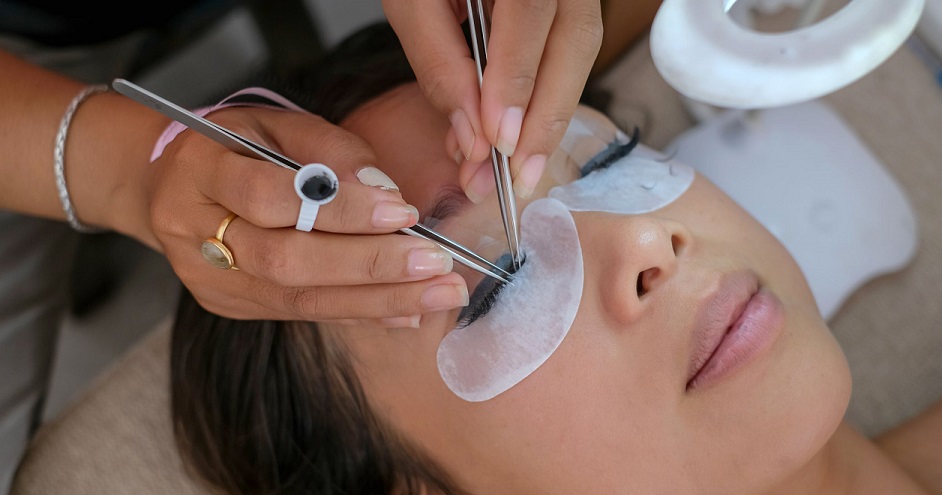
- Afterward, start separating out real/natural eyelashes one at a time using tweezers, followed by picking up one false strand, dipping the end into adhesive glue, and then attaching it onto the real/natural lash carefully, making sure no air bubbles are created afterward due to the presence of voids within spaces that are not filled correctly yet.
- Then, brush the entire set together using the mascara wand provided, so that everything blends nicely, achieving the desired results and eliminating any clumps created by excess product build up throughout the entire area.
- Lastly allow 5 minutes drying time before removing tape + gel pads.
- Afterwards, use a Q-tip soaked in special remover solution to remove any remaining residue left behind from the previous steps mentioned above.
- Finally, double check everything to make sure that no original real/natural hairs have been damaged prior to ending the appointment.
This is the process for applying the extensions to your clients. If you’d like to apply your own eyelash extensions, you can consult our detailed guide, but it’s much more complex.
The whole process explained in video
Applying eyelash extensions can take some practice, but with careful preparation beforehand, including discussing the looks desired by clients beforehand, along with sanitizing hands prior to starting the actual service, plus following the instructions outlined above thereafter, should result in a successful outcome every time! With proper training, anyone can become a certified professional providing quality results consistently, regardless of the situation faced.
Extra tips: How to hide gaps in eyelash extensions